01
引言
大型语言模型(LLM)近年来取得了长足进步,为通用人工智能(AGI)带来了曙光。这些模型展现出强大的文本理解和生成能力,但要真正接近人类智能的复杂性和多面性,LLM必须突破纯文本的限制,具备理解视觉信息的能力。为此,研究者们将目光投向了多模态大模型,旨在赋予模型感知和理解视觉信息的能力。
阿里国际AI团队提出了一种名为Ovis (Open VISion)的新型多模态大模型的架构。Ovis借鉴了LLM中的文本嵌入策略,引入了可学习的视觉嵌入表,将连续的视觉特征先转换为概率化的视觉token,再经由视觉嵌入表多次索引加权得到结构化的视觉嵌入。近期,阿里国际AI团队再次开源多模态大模型Ovis1.6,并在多模态权威综合评测基准OpenCompass上,在300亿以下参数开源模型中位居第一。Ovis1.6能胜任视觉感知推理、数学和科学、生活场景等多种多模态任务,尤其是在数学推理和视觉理解等多项任务中,得分甚至超过了闭源的GPT-4o-mini。
如何做到?阿里国际AI团队的核心思路是:从结构上对齐视觉和文本嵌入。如下图所示,Ovis包含三个组件:视觉tokenizer、视觉embedding表和LLM。

Ovis借鉴了大语言模型中的文本embedding策略,引入了可学习的视觉embedding表,将连续的视觉特征先转换为概率化的视觉token,再经由视觉embedding表多次索引加权得到结构化的视觉embedding。
文本方面,Ovis沿用当前大语言模型的处理方式,文本tokenizer将输入文本转化为one-hot token,并根据文本embedding表查找到每个文本token对应的嵌入向量。
最后,Ovis将所有视觉embedding向量与文本embedding向量拼接起来,经由Transformer处理,完成多模态任务。
基于Ovis1.5,本次开源的Ovis1.6进一步增强了高分辨率图像处理能力,采用了更大、更多样化且质量更高的数据集进行训练,并通过遵循指令微调的DPO训练过程优化了训练流程。
|
Ovis MLLMs |
ViT |
LLM |
|
Ovis1.6-Gemma2-9B |
Siglip-400M |
Gemma2-9B-It |
架构方面,采用动态子图方案,能灵活应对不同分辨率图像特征,提升了模型处理复杂视觉任务的能力。
数据方面,Ovis1.6在训练中涵盖了多种类型的数据集,包括Caption、OCR、Table、Chart、Math等,确保模型在广泛的应用场景中都有出色表现。
训练策略方面,采用DPO等方案持续优化模型性能,增强了模型在生成文本和理解复杂指令方面的能力,使得模型在复杂任务上的表现进一步提升。
消融实验的结果还显示,在训练数据、模型参数、LLM和视觉底座都保持相同的情况下,与基于MLP连接器的多模态大模型架构相比,Ovis性能整体提升了8.8%。
模型链接:
https://modelscope.cn/models/AIDC-AI/Ovis1.6-Gemma2-9B
代码链接:
https://github.com/AIDC-AI/Ovis
论文链接:
https://arxiv.org/abs/2405.20797
体验链接:
https://modelscope.cn/studios/AIDC-AI/Ovis1.6-Gemma2-9B
小程序体验:

魔搭社区ModelScope,,,
Ovis1.6-Gemma2-9B

小程序
02
模型体验
模型解读:
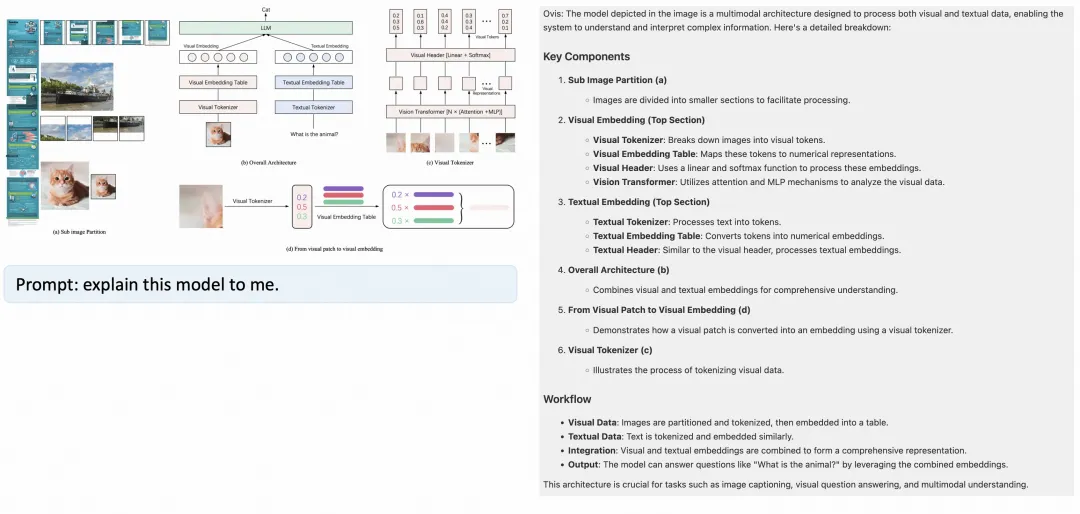
年报解读:

图片理解:
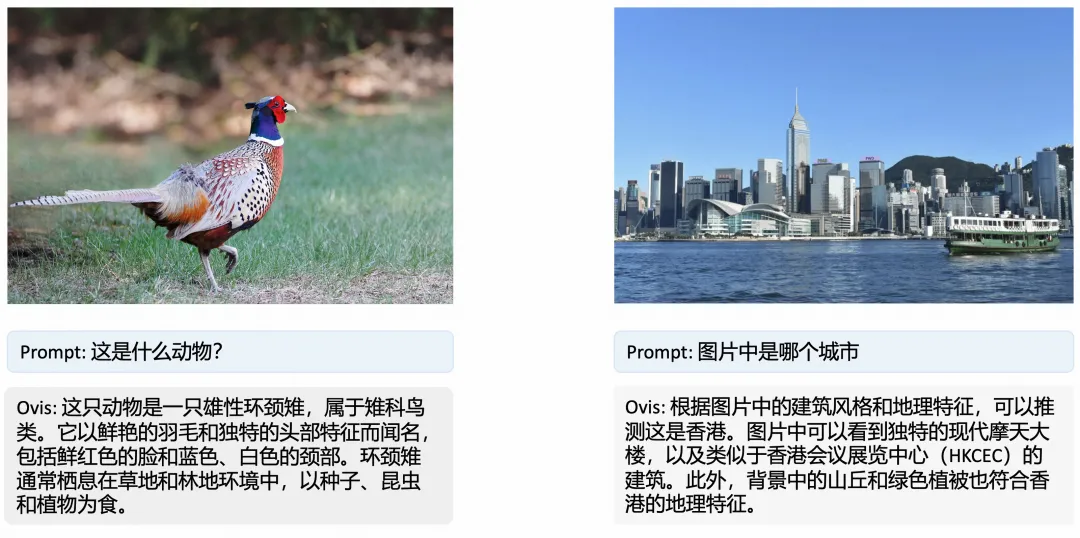
菜谱分析:
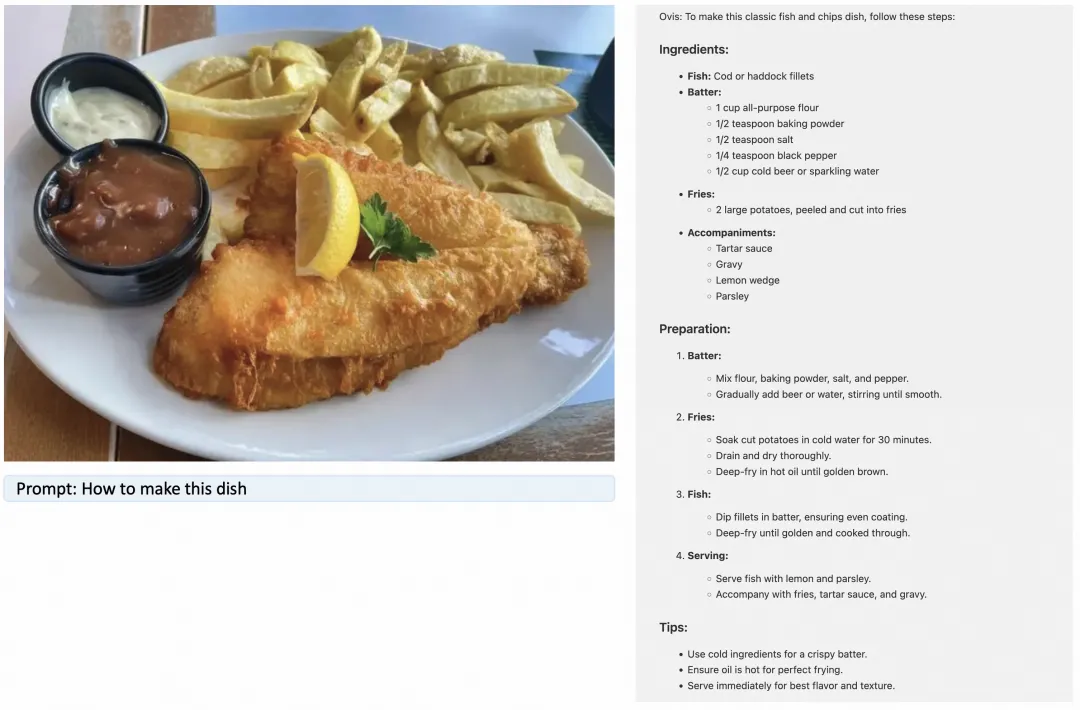
拍照解题:
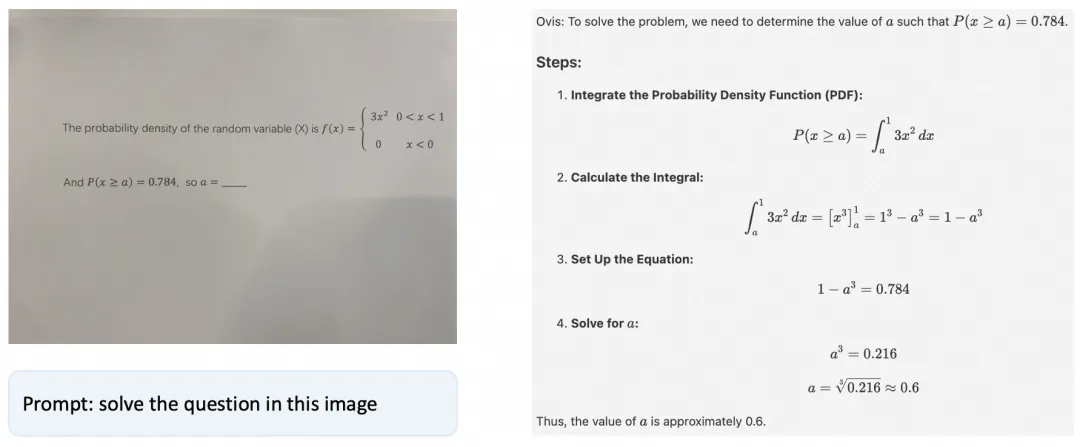
03
模型推理
import torchfrom PIL import Imagefrom modelscope import AutoModelForCausalLM
# load modelmodel = AutoModelForCausalLM.from_pretrained(“AIDC-AI/Ovis1.6-Gemma2-9B”, torch_dtype=torch.bfloat16, multimodal_max_length=8192, trust_remote_code=True).cuda()text_tokenizer = model.get_text_tokenizer()visual_tokenizer = model.get_visual_tokenizer()
# enter image path and promptimage_path = input(“Enter image path: “)image = Image.open(image_path)text = input(“Enter prompt: “)query = f'<image>\n{text}’
# format conversationprompt, input_ids, pixel_values = model.preprocess_inputs(query, [image])attention_mask = torch.ne(input_ids, text_tokenizer.pad_token_id)input_ids = input_ids.unsqueeze(0).to(device=model.device)attention_mask = attention_mask.unsqueeze(0).to(device=model.device)pixel_values = [pixel_values.to(dtype=visual_tokenizer.dtype, device=visual_tokenizer.device)]
# generate outputwith torch.inference_mode(): gen_kwargs = dict( max_new_tokens=1024, do_sample=False, top_p=None, top_k=None, temperature=None, repetition_penalty=None, eos_token_id=model.generation_config.eos_token_id, pad_token_id=text_tokenizer.pad_token_id, use_cache=True ) output_ids = model.generate(input_ids, pixel_values=pixel_values, attention_mask=attention_mask, **gen_kwargs)[0] output = text_tokenizer.decode(output_ids, skip_special_tokens=True) print(f’Output:\n{output}’)
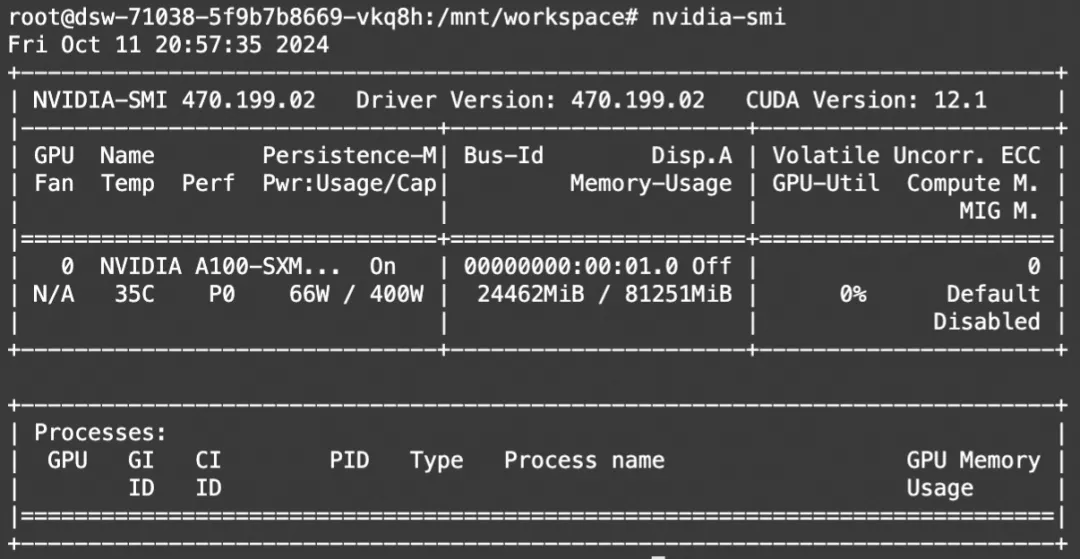
显存占用:
04
模型微调
我们使用ms-swift对Ovis1.6进行微调。ms-swift是魔搭社区官方提供的大模型与多模态大模型微调推理框架。
ms-swift开源地址:
https://github.com/modelscope/ms-swift
通常,多模态大模型微调会使用自定义数据集进行微调。在这里,我们将展示可直接运行的demo。我们使用Latex-OCR数据集:https://modelscope.cn/datasets/AI-ModelScope/LaTeX_OCR 进行微调。
在开始微调之前,请确保您的环境已准备妥当。
pip install ms-swift[llm]==2.* -U
微调脚本:
# 默认:微调 LLM, 冻结 vision encoderCUDA_VISIBLE_DEVICES=0 swift sft \ –model_type ovis1_6-gemma2-9b \ –model_id_or_path AIDC-AI/Ovis1.6-Gemma2-9B \ –sft_type lora \ –dataset latex-ocr-print#5000
# Deepspeed ZeRO2NPROC_PER_NODE=4 \CUDA_VISIBLE_DEVICES=0,1,2,3 swift sft \ –model_type ovis1_6-gemma2-9b \ –model_id_or_path AIDC-AI/Ovis1.6-Gemma2-9B \ –sft_type lora \ –dataset latex-ocr-print#5000 \ –deepspeed default-zero2
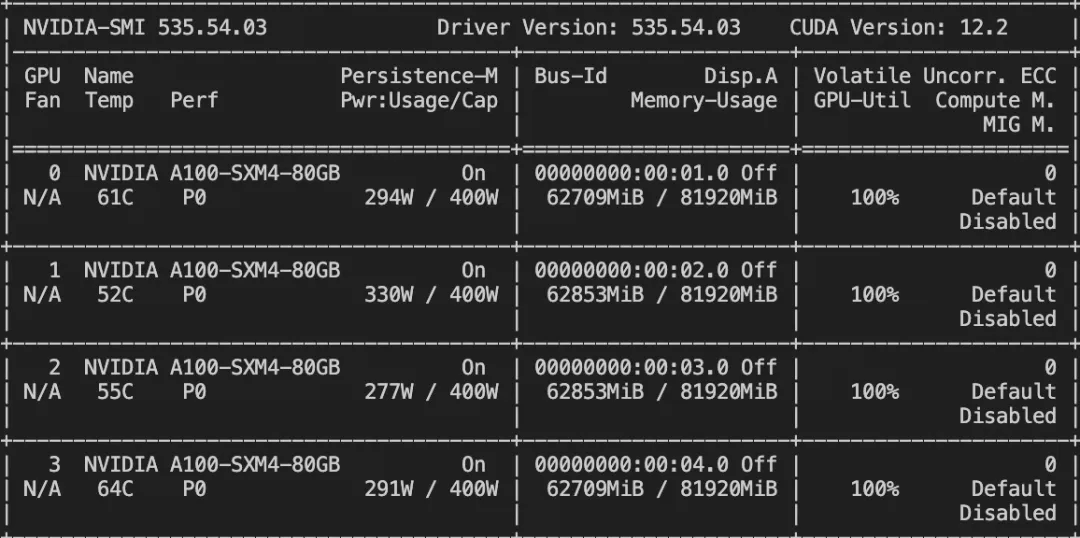
训练显存占用:
如果要使用自定义数据集,只需按以下方式进行指定:
# val_dataset可选,如果不指定,则会从dataset中切出一部分数据集作为验证集 –dataset train.jsonl \ –val_dataset val.jsonl \{“query”: “<image>55555”, “response”: “66666”, “images”: [“image_path”]}{“query”: “<image><image>eeeee”, “response”: “fffff”, “history”: [], “images”: [“image_path1”, “image_path2”]}{“query”: “EEEEE”, “response”: “FFFFF”, “history”: [[“query1”, “response1”], [“query2”, “response2”]]}
训练loss图:

微调后推理脚本如下:
CUDA_VISIBLE_DEVICES=0 swift infer \ –ckpt_dir output/ovis1_6-gemma2-9b/vx-xxx/checkpoint-xxx \ –load_dataset_config true
# or merge-lora & inferCUDA_VISIBLE_DEVICES=0 swift infer \ –ckpt_dir output/ovis1_6-gemma2-9b/vx-xxx/checkpoint-xxx \ –load_dataset_config true –merge_lora true
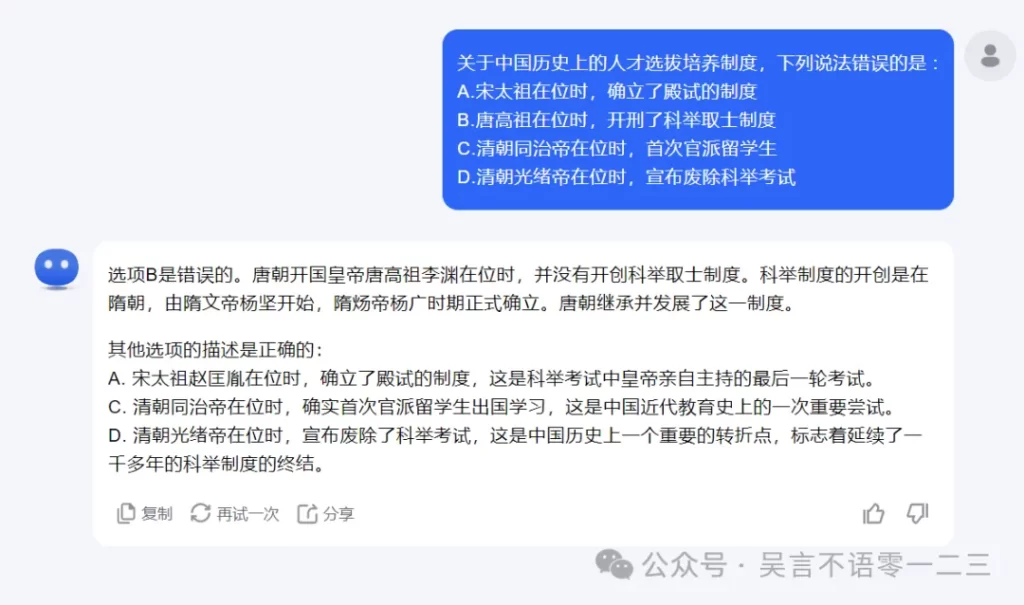
微调后模型对验证集进行推理的结果:




暂无评论内容